The Essential Guide to Cleaning Your Coffee Maker: For Better Taste and Longevity
Your coffee maker is the unsung hero of your daily routine, diligently brewing the elixir that kickstarts your mornings and fuels your afternoons. But just like any hardworking appliance, it needs regular cleaning to perform optimally. Neglecting this crucial maintenance task can lead to a build-up of coffee residue, mineral deposits (scale), and even mold or bacteria, all of which can negatively impact the taste of your coffee and the lifespan of your machine. This comprehensive guide will walk you through the essential steps and best practices for cleaning various coffee makers, ensuring you consistently enjoy delicious brews and a long-lasting appliance.
Why Cleaning Your Coffee Maker is Non-Negotiable
Think about it: every time you brew coffee grounds, their oils leave residue in your machine. Over time, this residue can become rancid, imparting a bitter or stale taste to your fresh coffee. Furthermore, hard water, common in many areas, contains minerals that precipitate during the heating process, forming scale. This scale can clog water lines, reduce heating efficiency, and damage internal components. Finally, the warm, moist environment inside a coffee maker can be a breeding ground for mold and bacteria, posing potential health risks.
Regular cleaning addresses these issues, ensuring:
- Improved Coffee Taste: Removing old residue allows the authentic flavor of your freshly brewed coffee to shine through.
- Optimal Machine Performance: A clean machine operates efficiently, brewing at the correct temperature and flow rate.
- Extended Lifespan: Preventing scale build-up and removing corrosive residues helps prolong the life of your coffee maker.
- Better Hygiene: Eliminating mold and bacteria ensures a healthier brewing environment.
The Basic Routine: Daily and Weekly Cleaning Habits
Establishing a simple daily and weekly cleaning routine can significantly reduce the need for more intensive cleaning later on.
Daily Cleaning:
- Empty and Rinse: Immediately after brewing, empty the carafe or mug and rinse it thoroughly with hot, soapy water.
- Discard Grounds and Rinse Filter Basket: Dispose of used coffee grounds and rinse the filter basket under running water to remove any remaining particles. For reusable filters, wash them with soap and water.
Weekly Cleaning:
- Wash Removable Parts: Wash the carafe, filter basket, permanent filter (if applicable), and any other removable parts with hot, soapy water. Use a non-abrasive sponge or brush to remove any stubborn residue. Rinse thoroughly and allow to air dry or dry with a clean cloth.
- Wipe Down the Exterior: Wipe down the exterior of your coffee maker with a damp cloth to remove any spills or dust.
The Deep Clean: Descaling Your Coffee Maker (Monthly or Quarterly)
Descaling is the process of removing mineral build-up (scale) from your coffee maker. The frequency of descaling depends on the hardness of your water – if you live in Derby, England, which often has moderately hard to hard water, more frequent descaling (perhaps monthly or every other month) may be necessary. Here are standard methods for descaling:
Using White Vinegar:

- Prepare the Vinegar Solution: Mix equal parts white vinegar and water. The amount will depend on your coffee maker's capacity (e.g., 2-4 cups of each for a standard 10-12 cup machine).
- Pour into the Reservoir: Pour the vinegar solution into the water reservoir.
- Run a Brewing Cycle (Halfway): Turn on your coffee maker and allow it to run through about half of a normal brewing cycle.
- Pause and Let it Sit: Turn off the coffee maker and let the vinegar solution sit in the reservoir for about an hour to allow it to break down the mineral deposits.
- Complete the Brewing Cycle: Turn the coffee maker back on and allow it to finish the brewing cycle.
- Rinse with Fresh Water: Empty the carafe and reservoir. Fill the reservoir with fresh, clean water and run a full brewing cycle. Repeat this process with fresh water at least two to three times to thoroughly rinse away any lingering vinegar taste and loosened scale.
- Wash Removable Parts: Wash the carafe and filter basket as usual.
Using a Commercial Descaling Solution:
- Follow Manufacturer Instructions: Always use a descaling solution specifically designed for coffee makers and carefully follow the instructions provided on the product packaging.
- Typically Involves Diluting: Most descaling solutions must be diluted with water in the reservoir.
- Run a Brewing Cycle: A complete brewing cycle with the descaling solution.
- Rinse Thoroughly: After the descaling cycle, rinse the coffee maker thoroughly by running several full brewing cycles with fresh, clean water, just as you would with vinegar.
- Wash Removable Parts: Wash the carafe and filter basket as usual.
Cleaning Specific Types of Coffee Makers: Tailored Approaches
While the general principles of cleaning apply to most coffee makers, some types require specific attention:
Drip Coffee Makers:
- Focus on descaling the reservoir and water lines.
- Ensure the spray nozzle or showerhead is clear of any blockages. You can often gently scrub it with an old toothbrush.
Single-Serve Coffee Makers (e.g., Keurig):
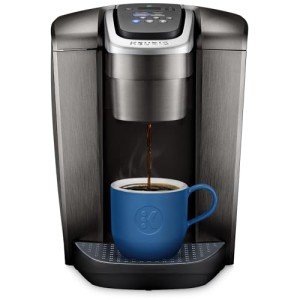
Keurig K-Elite Single Serve Coffee Maker
Brew your perfect cup of coffee in minutes with this versatile and user-friendly machine
Product information
$139.99 $129.99
Product Review Score
4.97 out of 5 stars
184 reviewsProduct links
- Regularly descale using the manufacturer's recommended method (often involving a descaling solution or vinegar).
- Clean the exit needle and K-Cup holder to remove coffee grounds and residue. Some models have removable parts for easier cleaning.
- Wipe down the exterior and the drip tray frequently.
- Consider cleaning the water reservoir with soapy water and rinsing thoroughly.
French Press:
- Disassemble all parts after each use (plunger, filter, carafe).
- Wash each component thoroughly with hot, soapy water. Pay close attention to the mesh filter to remove trapped coffee grounds. A brush can be helpful.
- Rinse all parts completely before reassembling.
Espresso Machines:
- Backflushing (for semi-automatic and automatic machines) removes coffee oils from the brew group. Follow your machine's instructions for backflushing, often using a blind filter and a cleaning solution.
- Regularly clean the portafilter and filter baskets.
- Wipe down the steam wand immediately after use and periodically purge it thoroughly. Descale the machine according to the manufacturer's instructions, as scale build-up can significantly impact espresso machine performance.
- Clean the milk frothing pitcher thoroughly after each use.
Recognizing the Signs: When Your Coffee Maker Needs Cleaning
Pay attention to these telltale signs that indicate your coffee maker needs a good cleaning:
- Bitter or Stale Tasting Coffee: This is often the first indicator of residue build-up.
- Slow Brewing Time: Scale or residue can restrict water flow.
- Noisy Operation: Unusual gurgling or sputtering sounds can indicate blockages.
- Visible White or Brown Deposits: These are signs of mineral scale.
- Unpleasant Odors: Mold or bacterial growth can produce musty or sour smells.
Conclusion: A Clean Machine for a Perfect Cup
Cleaning your coffee maker might seem like a chore, but the benefits – better tasting coffee, improved machine performance, and a longer lifespan – are well worth the effort. By establishing a simple daily and weekly cleaning routine and performing regular descaling, especially if you live in a hard water area, you can ensure that your trusty coffee maker continues to deliver the perfect brew, day after day. So, take a few moments to care for your machine, and enjoy the consistently delicious coffee it provides.